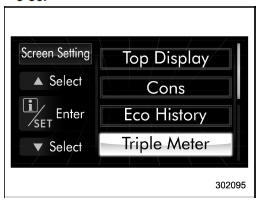
Screen settings
The items in screen settings can be set.
To change the items, operate the or
or
 switch, and then pull the “
 /SET”
/SET”
switch toward you.
Preparation for screen settings
1. Turn the ignition switch to the “ON” position.
2. Pull and hold the “ /SET” switch
toward you to show the selection screen.
3. After the selection screen is displayed,
operate the or
switch to show the
“Screen Setting” item. Then, pull the “
/
SET” switch toward you.
Top display setting
1. Perform the preparation steps according to “Preparation for screen settings
2. Operate the or
switch to
select the “Top Display” item. Then pull the
“ /SET” switch toward you.
3. Pull the “ /SET” switch once
more.
4. Select an item by operating the
or
switch. Then pull the “
/SET” switch
toward you.

5. Select “Set” by operating the
switch, and confirm the setting by pulling
the “ /SET” switch toward you.
6. The system will notify you that the setting is complete.
Fuel consumption screen setting
1. Perform the preparation steps according to “Preparation for screen settings” .
2. Operate the or
switch to
select the “Cons” item. Then pull the “
/
SET” switch toward you.
3. Pull the “ /SET” switch once
more.
4. Select the displayed configuration by
operating the or
switch. Then pull
the “ /SET” switch toward you.
5. Select “Set” by operating the
switch, and confirm the setting by pulling
the “ /SET” switch toward you.
6. The system will notify you that the setting is complete.
Economy history setting
1. Perform the preparation steps according to “Preparation for screen settings” .
2. Operate the or
switch to
select the “Eco History” item. Then pull the
“ /SET” switch toward you.
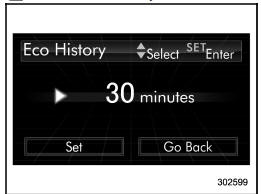
3. Pull the “ /SET” switch once
more.
4. Select the time of the logged fuel
consumption history by operating the
or
switch, and then pull the “
/
SET” switch toward you.
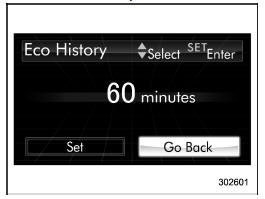
5. Select “Go Back” by operating the
switch.
6. Select “Set” by operating the
switch and confirm the setting by pulling
the “/SET” switch toward you.
7. The system will notify you that the setting is complete.
Triple meter setting
1. Perform the preparation steps according to “Preparation for screen settings” .
2. Operate the or
switch to
select the “Triple Meter” item. Then pull
the “ /SET” switch toward you.
3. Select the setting location (left, center
or right) by operating the  or
or
switch. Then pull the “ /SET”
switch
toward you.
NOTE
The same item cannot be selected for the left, center or right location.
4. Select the preferred item by operating
the or
switch. Then pull the “
/
SET” switch toward you.
If you also want to change the setting for another location, repeat steps 3 and 4.
5. Select “Set” by operating the
switch, and confirm the setting by pulling
the “ /SET” switch toward you.

6. The system will notify you that the setting is complete.
Clock/calendar screen setting
1. Perform the preparation steps according to “Preparation for screen settings” .
2. Operate the or
switch to
select the “Clock” item. Then pull the “
/
SET” switch toward you.
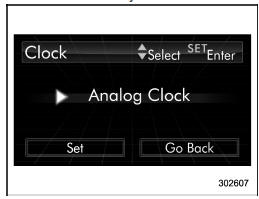
3. Pull the “ /SET” switch once
more.

4. Select “Analog Clock”, “Digital Clock”,
“Calendar” or “Off” by operating the
switch. Then pull the “ /SET”
switch
toward you.
5. Select “Set” by operating the
switch, and confirm the setting by pulling
the “ /SET” switch toward you.
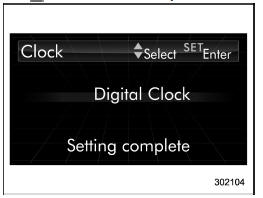
6. The system will notify you that the setting is complete.
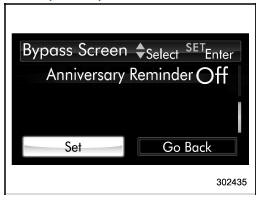
Bypass screen setting
1. Perform the preparation steps according to “Preparation for screen settings” .
2. Operate the  or
switch to
or
switch to
select the “Bypass Screen” item. Then pull
the “ /SET” switch toward you.
3. Select the item to set by operating the
 or
switches. Then pull the “
or
switches. Then pull the “
/
SET” switch toward you.
4. Select “On” or “Off” by operating the
 or
switch. Then pull the “
/SET”
or
switch. Then pull the “
/SET”
switch toward you.
If you want to change setting for another item, repeat steps 3 and 4.
5. Select “Set” by operating the 
or
switch, and confirm the setting by
pulling the “ /SET” switch toward
you.
6. The system will notify you that the setting is complete.
Language setting
1. Perform the preparation steps according to “Preparation for screen settings” .
2. Operate the or
switch to
select the “Languages” item. Then pull the
“ /SET” switch toward you.
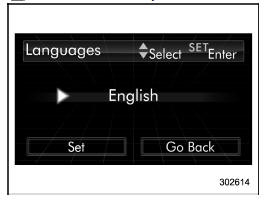
3. The current language setting will be
displayed. Pull the “ /SET” switch
toward
you to enter the language selection mode.
4. Select the preferred language by
operating the or
switch. Then
pull the “ /SET” switch toward you.
5. Select “Set” by operating the
switch and confirm the setting by pulling
the “ /SET” switch toward you.

6. The system will notify you that the setting is complete.