Hyundai Tucson: Multi Air Mode
Multi Air Mode (if equipped)
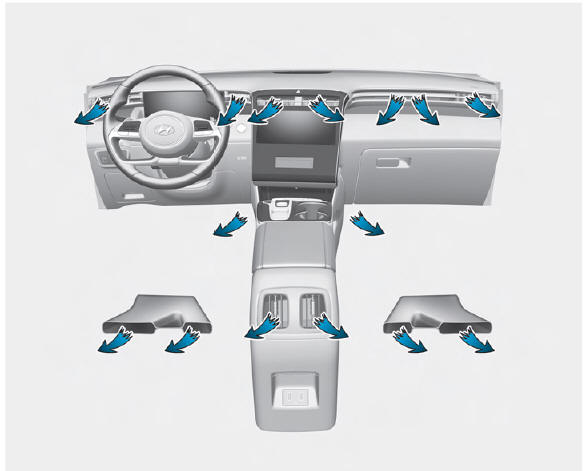
When the Multi-Air mode button is pressed, air flow is directed to the face level and floor level and through perforated sections along the instrument panel for the driver and passenger. The multi-air mode LED indicator will be illuminated. If the multi air mode button is pressed when the air volume is beyond level 4, it decreases to Level 3.
OFF
If you press the multi-air button again, the indicator will turn OFF and the directed air flow will be according to the previous setting before multi-air mode was enabled.
If you press the MODE selection button, the airflow will change based on the MODE selected.
System operation
Ventilation
- Set the mode to the
 position.
 - Set the air intake control to the outside (fresh) air position.
- Set the temperature control to the desired position.
- Set the fan speed control to the desired speed.
Heating
- Set the mode to the
 position.
 - Set the air intake control to the outside (fresh) air position.
- Set the temperature control to the desired position.
- Set the fan speed control to the desired speed.
- If desired, turn the air conditioning ON with the temperature control knob set to heat in order to dehumidify the air before it enters into the cabin.
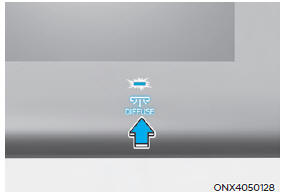
If the windshield fogs up, set the mode
to the  or
or position.
Operation Tips
- To help keep dust or unpleasant fumes from entering the vehicle through the ventilation system, temporarily set the air intake control to the recirculated air position. Be sure to return the control to the fresh air position when the irritation has passed to keep fresh air in the vehicle. This will help keep the driver alert and comfortable.
- To prevent interior fog on the windshield, set the air intake control to the fresh air position and fan speed to the desired position, turn on the air conditioning system, and adjust the temperature control to the desired temperature.
Air conditioning
HYUNDAI Air Conditioning Systems are filled with R-1234yf refrigerant.
- Start the engine. Push the air conditioning button.
- Set the mode to the
 position.
 - Set the air intake control to the outside air or recirculated air position.
- Adjust the fan speed control and temperature control to maintain maximum comfort.

Information
Your vehicle is filled with R1234yf according to the regulation in your country at the time of production. You can find out which air conditioning refrigerant is applied to your vehicle on the label located inside of the hood. Refer to chapter 8 for the location of the air conditioning refrigerant label.
NOTICE
- The refrigerant system should only be serviced by trained and certified technicians to insure proper and safe operation.
- The refrigerant system should be serviced in a well-ventilated place.
- The air conditioning evaporator (cooling coil) shall never be repaired or replaced with one removed from a used or salvaged vehicle and new replacement MAC evaporators shall be certified (and labeled) as meeting SAE Standard J2842.
NOTICE
- When using the air conditioning
system, monitor the temperature
gauge closely while driving up
hills or in heavy traffic when
outside temperatures are high.
Air conditioning system operation may cause engine overheating.
Continue to use the fan but turn the air conditioning system off if the temperature gauge indicates engine overheating.
- When opening the windows in humid
weather air conditioning may create
water droplets inside the vehicle.
Since excessive water droplets may cause damage to electrical equipment, air conditioning should only be used with the windows closed.
Air conditioning system operation tips
- If the vehicle has been parked in direct sunlight during hot weather, open the windows for a short time to let the hot air inside the vehicle escape.
- After sufficient cooling has been achieved, switch back from the recirculated air to the fresh outside air position.
- To help reduce moisture inside of the windows on rainy or humid days, decrease the humidity inside the vehicle by operating the air conditioning system with the windows and sunroof closed.
- Use the air conditioning system every month for a few minutes to ensure maximum system performance.
- If you operate the air conditioner excessively, the difference between the temperature of the outside air and that of the windshield could cause the outer surface of the windshield to fog up, causing loss of visibility. In this case, set the mode selection button to the position and set the fan speed control knob to the lowest speed setting.
READ NEXT:
 System maintenance
Cabin air filter
[A] : Outside air, [B] : Recirculated air
[C] : Cabin air filter, [D] : Blower
[E] : Evaporator core, [F] : Heater core
The cabin air filter is installed behind
the glove box. It filters the dust or other
pollutants that en
Windshield defrosting and defogging
WARNING
Windshield heating
Do not use the position
during
cooling operation in extremely humid
weather. The difference between the
temperature of the outside air and that
of the windshield could cause the outer
surface of the windshield to f
Climate control additional features
Auto Defogging System on Models with Automatic Temperature Control
Auto defogging helps reduce the
possibility of fogging up the inside of the
windshield by automatically sensing the
moisture on inside the windshield.
The auto defogging sy
SEE MORE:
Lane Keeping Assist Operation
Warning and control
Lane Keeping Assist will help warn and
control the vehicle with Lane Departure
Warning and Lane Keeping Assist.
Lane Departure Warning
To warn the driver that the vehicle is
departing from the projected lane in
fro
Cylinder Block - Components
Cylinder block
Water jacket insert (Exhaust)
Water jacket insert (Intake)
Lower crankcase
Oil jet
O-ring
Piston
ring
(No.1
ring
Piston
ring
(No.2
ring)
Piston
ring(Oil
ring)
Piston
Piston
snap ring
Information
- Home
- Hyundai Tucson - Fourth generation (NX4) - (2020-2023) - Owner's Manual
- Hyundai Tucson - Fourth generation (NX4) - (2020-2023) - Workshop Manual
